
Description
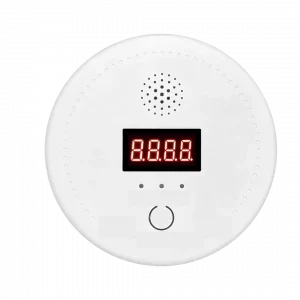
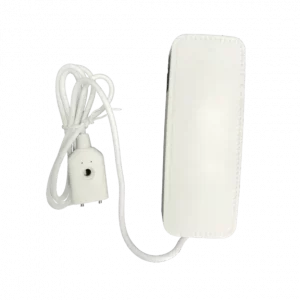
The Smoking Detector is an intelligent security device designed for real-time monitoring of environmental smoke and fire prevention. It is equipped with a sophisticated optical sensor that can sensitively detect smoke particles in the air.
Once the smoke concentration exceeds the safe threshold, the device immediately triggers a high-decibel audible and visual alarm to alert people on-site of the danger. Some smart models also support networking capabilities, enabling remote notification of alarm information to users’ mobile devices.
Widely installed in smoke-free areas such as homes, hotels, and warehouses, it effectively mitigates fire risks caused by smoking and serves as a crucial safeguard for protecting lives and property.
Main Product Functions
-
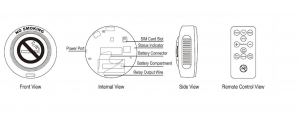
Selectable alarm voice prompts; custom client voice audio can be copied to the device via USB cable.
-
Alarm sensitivity level is configurable and can be configured remotely for greater flexibility.
-
Voice volume level is configurable.
-
Features an air suction fan for faster response; can be configured to open or close.
-
Alarm reset mode can be configured as automatic or manual mode to meet different needs.
-
Alarm Modes: Platform, WeChat, Phone call, SMS.
-
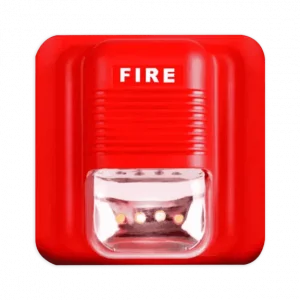
Optional RF433 wireless output, used to link with wireless sound and light alarms/strobes.
-
Optional relay output, used to link with exhaust fans and other equipment.
-
Full process voice prompts.
-
4G Cat. 1 communication; can link with 4G NB IoT devices via the platform.
-
Self-test function: Indicates various product operating statuses.
-
Signal fault indication with the operation center.
-
Local and remote signal strength indication.
Installation and Operation Instructions
The product is secured using two screws.
1. Installation Guidelines
-
The device should be installed as close to the center of the area to be monitored as possible, in a location with good network signal quality to avoid voltage leakage.
-
The installation location should be kept away from large metal objects or high-interference inductive equipment, and should also avoid obstacles such as moisture and dust.
The device should NOT be installed in the following locations:
-
Kitchens, near water heaters, or in high-temperature areas.
-
Areas with excessive dust, dirt, or where insects are present.
-
Near stoves where it could be contaminated or exposed to high heat.
-
Places where it could be obstructed by objects.
-
When installing on slanted walls or ceilings, the alarm installation point must be at a minimum distance from the highest point.
2. Operation Instructions
A. Power-On and Self-Test
(Example based on full-feature version; configurations may vary)
-
After powering on:
-
The white indicator flashes once.
-
The red indicator flashes once.
-
The green indicator lights up.
-
Voice prompt: “Device powering on, connecting to network.”
The device enters initialization, self-test, and network connection processes.
-
-
If the device itself and its Cat.1 network communication are normal:
-
The green indicator flashes, entering signal strength display mode.
-
Voice playback announces signal quality.
Refer to the Status Display Reference Table for details.
-
-
If a self-test issue is detected:
-
The red indicator flashes, entering fault display mode.
-
A voice prompt announces the specific fault.
Refer to the Status Display Reference Table for details.
-
-
After the device successfully connects to the cloud platform:
-
The blue indicator lights up, indicating normal operation mode.
-
B. Device Parameter Configuration (via Remote Control)
Configure parameters after installation and initial self-test.
1. Alarm Sensitivity Level
-
Sets sensitivity for smoke/dust detection.
-
10 levels available (1–10).
-
Use the “Sensitivity +” and “Sensitivity -” buttons.
-
Level 10 = most sensitive.
-
Level 0 = insensitive.
-
Factory default: Level 6.
2. Alarm Voice Prompt Selection
-
Cycle through different alarm voice prompts.
-
Use “Previous Track” and “Next Track” buttons.
-
Voice content depends on USB-loaded or factory default files.
3. Volume Setting
-
4 levels: Mute / Low / Medium / High.
-
Press the “Volume” button to cycle.
-
Factory default: High.
4. Fan On/Off Setting
-
Press the “Fan” button to toggle.
-
The fan accelerates airflow for faster detection.
-
May generate some noise.
-
Factory default: Off.
5. Alarm Reset Mode
-
Options: Auto Mode / Manual Mode.
-
Press the “Mode” button to toggle.
Auto Mode:
-
Automatically returns to monitoring after smoke/dust clears.
Manual Mode:
-
Requires pressing the “Test/Reset” button on the remote or holding the device button for over 3 seconds.
Factory default: Auto Mode.
6. Device Power On/Off
-
Press the “Power” button to toggle.
7. External Indicator On/Off
-
Press the “Indicator” button to toggle.
-
(Function currently unavailable.)
8. Test Alarm
-
Initiates a test alarm without real smoke/dust.
-
Press “Test/Reset” on the remote or device.
9. Alarm Mute/Silence
-
During alarm, short press the device button to mute/cancel alarm sound.
C. Platform Parameter Configuration and Control
Some parameters can be set remotely via the platform.
-
Set Alarm Sensitivity Level (10 levels, default 6).
-
Cycle alarm voice prompts.
-
Set Volume Level (Mute / Low / Medium / High).
-
Set Fan On/Off.
-
Set Alarm Reset Mode (Auto / Manual).
-
Device Shutdown (restart via remote or repowering).
-
Device Reboot (for troubleshooting).
-
Data Upload Interval
-
Unit: minutes
-
Default: 120 min
-
Range: 3–65535 min
-
-
Set Over-Temperature Alarm Threshold
-
Unit: °C
-
Default: 57°C
-
Range: 1–100°C
-
-
Set Rapid Temperature Rise Alarm Threshold
-
Unit: °C
-
Default: 7°C
-
Range: 1–100°C
-
Over-Temperature Alarm Enable/Disable
-
Default: Enabled
-
Rapid Temperature Rise Alarm Enable/Disable
-
Default: Enabled
Note: Temperature-related functions depend on the specific device model.
D. Function Testing
Alarms can be triggered via:
-
Device button
-
Remote control
-
Smoke
-
Dust
E. Voice File Management
-
Connect the device to a computer using a data-capable USB cable.
-
Drivers auto-install and a removable drive appears.
Inside the drive:
-
Folder A: System language files (Do NOT delete).
-
Folder B: Alarm voice files (Can be deleted or replaced).
After copying new alarm voice files:
-
Safely eject the removable drive.
-
Restart the device for changes to take effect.
Reviews
There are no reviews yet.